
IES ConcreteBending User's Guide
Program Layout
The best way to learn ConcreteBending is to use and explore the program to get to know what is available under each button or menu. Several Tutorial Videos are also available which explain many features of the software.
The image below introduces the program terminology used in this help file and the training videos. Panels may be resized by dragging their dividers or repositioned by dragging their title bars or right-clicking on the title. Use the "pushpin" icon to collapse panels temporarily to gain more space for working. Hold the mouse pointer over the screen image below for information about each area of the program.
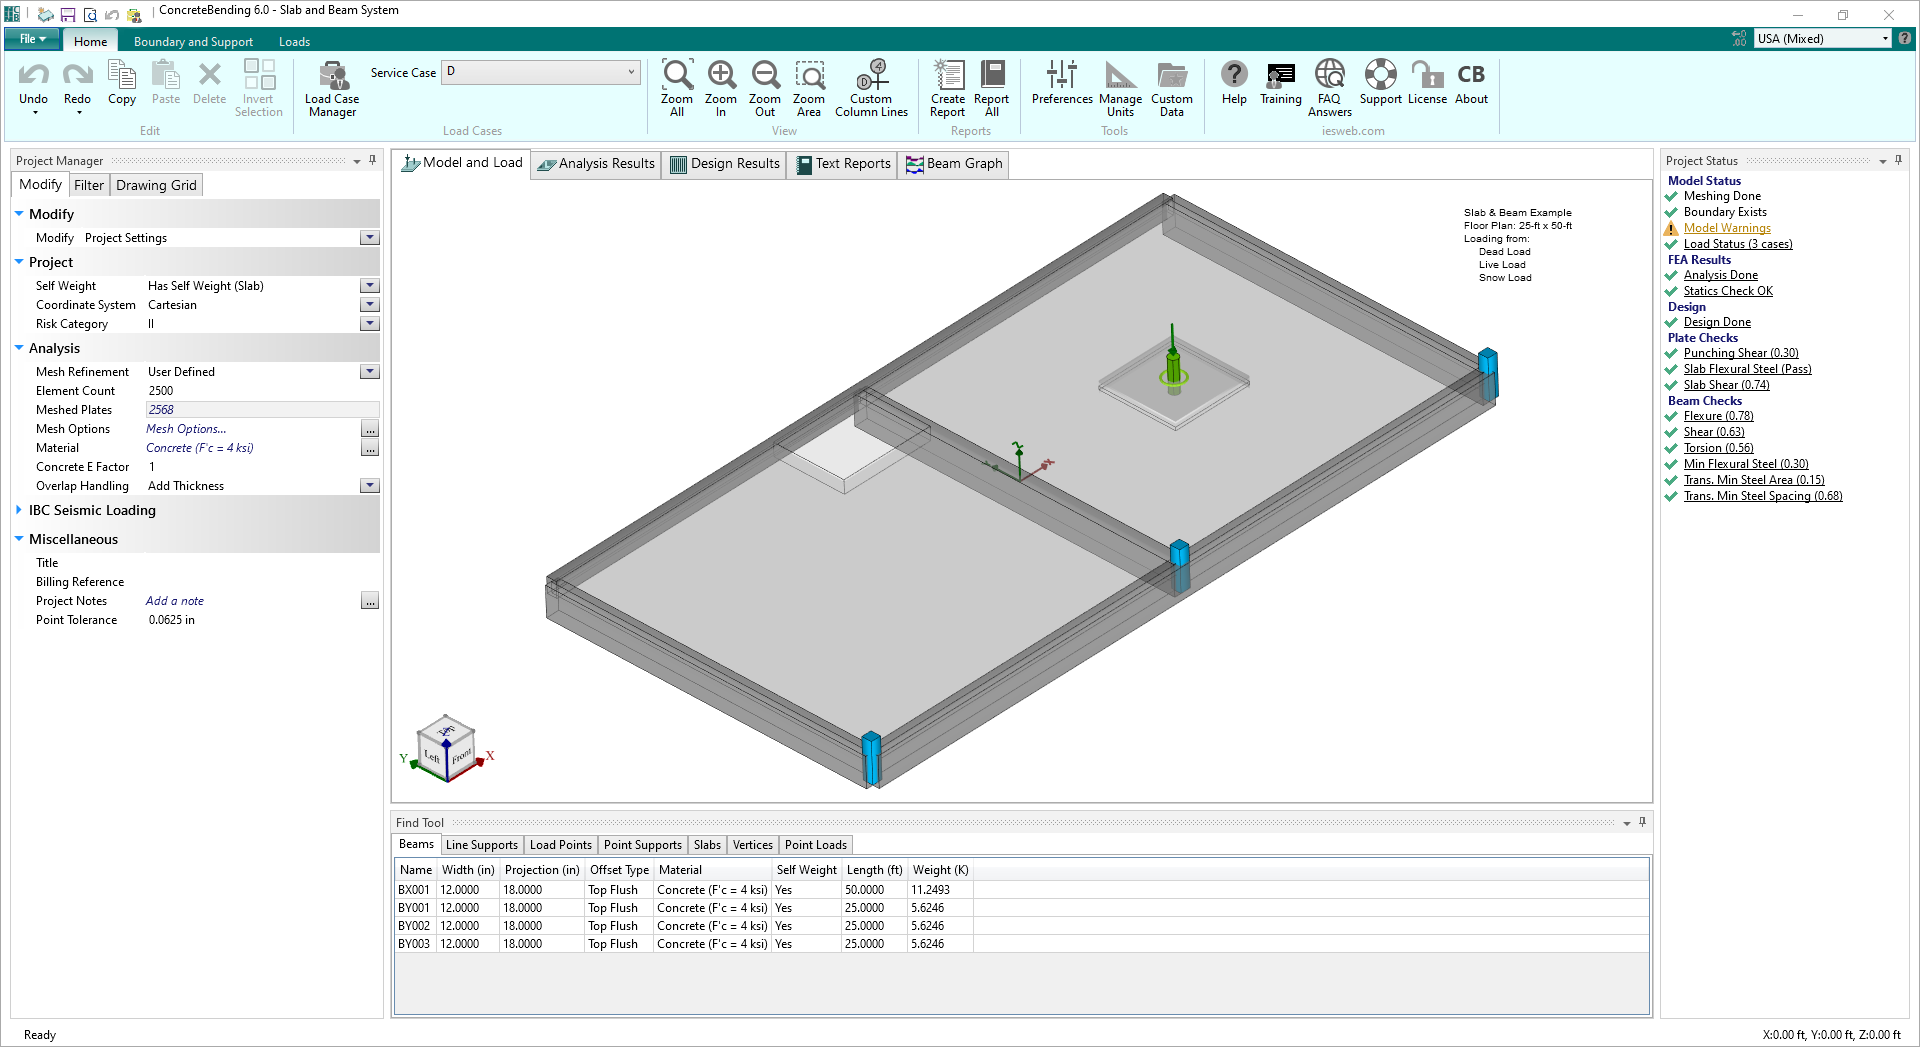
The title bar displays the version of ConcreteBending and the file name of the project. Also, there are helpful buttons in addition to the Windows system buttons.
The main menu, Toolbar, or Ribbon, contains various commands to direct ConcreteBending. Each is organized within a group to help locate them quickly. Each command has a description which appears when the mouse pointer is hovered over it. Many have hot-key shortcuts.
The Project Manager provides immediate access to frequent operations in ConcreteBending. This tool is docked on the left side of the window by default and displays various tabs depending on the active window. This window can be docked on the left or made to float independently if more space is needed to work. Alternatively, drag the side border to make it wider or narrower.
These views provide a way to view the model, analysis results, design results, and reports. Each tab displays different options and will provide different information in the Project Manager and Find Tool. Some Graphic tabs will only appear based on objects in your model, such as the Beam diagrams.
This panel provides a quick update on what is done, what is in-progress, and whether things are working or failing in your model or checks. Click on any item that is underlined for more information, a report, or a dialog containing quick actions.
Shows background meshing/analysis/design progress. Background processing is done on a separate thread of your processor so you may continue working while they run. The only time you need to wait for the program is when the mouse cursor changes into an hour-glass or if you wish to view the analysis or design checks that are currently in-progress. Detailed progress bars are available for background activity by clicking on the status-bar at the bottom of the screen.
The Find Tool provides an efficient way to view, select, and edit slabs, members, supports, loads, etc. This tool is docked on the bottom of the window by default. Use F7 or the push-pin icon to auto-hide this panel. When docked, drag the side border to make the panel larger or smaller. The Find tool allows you to find, select, edit, and delete objects even if they are not visible in the active window. Double-click on an element (slab, pile, pier, etc) and the graphics window will zoom-in to show that element, if it is visible. Lists shown in the Find tool can be sorted by clicking on a column header (click again to reverse the order). Select items just like any list in Windows using the Shift and Ctrl keys to select a range or to toggle individual items.
Above the toolbar on the far right is the Units drop-down for selecting the way physical quantities are displayed. Change the number of decimal places or significant digits using the icon to the left of the unit selector. Go to to create custom unit styles or edit existing unit styles.
Enter values in any unit style. Enter any number or math expressions followed by a known abbreviation. Length units may be entered in "ft-in-16ths" notation as well. Entered values are converted and then redisplayed in the current 'display' units.
Right-Click the mouse for a short menu of relevant commands based on the view and what is selected.
Depending on your system, you may need to go into Control Panel, Hardware, Mouse, and set the wheel button to behave like a "middle button click". Some mouse utility programs may override that setting or it may not be set up on some versions of Windows.